Did you know that not all bees nest in hives? Some bees use other places to lay their eggs, like in pieces of wood or in the ground. Unfortunately, as their habitat disappears, it can be hard for bees to find safe places to nest.
You can help these little superheroes by building a bee condo near your pollinator garden! Follow these instructions and take the Pollinator Power Mission to the next level.
NOTE: The bee condo will bring more bees to your garden. While bees generally aren’t aggressive, it is strongly recommended that once the bee condo is in place, it is left alone.
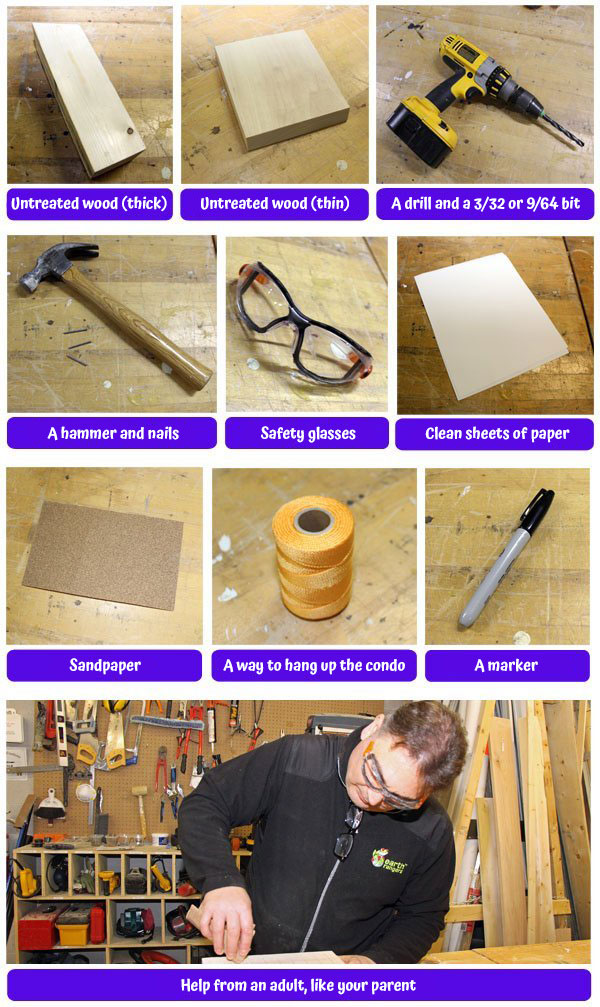
Here’s What You’ll Need

What to do…
Step 1:
Take your thicker piece of untreated wood and on one side mark where you want to drill your holes. Make sure there is about a half-inch between each hole.
Step 2:
Drill the holes, making them about 4 inches deep. Make sure you don’t go all the way through the wood.
Tip: Using different-sized drill bits (between 3/32 in and 9/64 in) means your bee condo can be used by different types of cavity-nesting bees!
Step 3:
Grab your sandpaper and use it to smooth the edges around each of the holes.
Step 4:
Build a roof for your condo using the thinner wood and attach it to the top of the piece of wood. This will give some shade over the entrances of the holes.
Step 5:
Roll up some paper into the shape of a straw and put it in each hole, making sure it’s a snug fit. Each roll must be several layers thick. Trim off any extra paper sticking out of the holes.
Tip: Color the edge of the paper with your black marker. This will help attract more bees to your condo.
Step 6:
Place your bee condo in a bright, sunny spot close to your pollinator garden, making sure the side with the holes is not covered and the bee condo is hanging straight.
Tip: Once your bee condo is in a secure place, let the bees make it into a nesting place. It is recommended that once the bee condo is in place, it is left alone.
Step 7:
During the winter, protect your bee condos by putting them in a cool place like an unheated shed, basement, or garage. When spring arrives, set up your condo back in the same place as before.
Step 8:
Once the young bees have emerged from your bee condo, have a parent help you remove and throw away the old paper inserts.
Step 9:
Add new paper inserts (mentioned in Step 4), then place your bee condo in the same spot as before. Remember, once your bee condo is up and secure, you’ll need to let the bees make it into their nesting place. It is recommended that once the bee condo is in place, it is left alone.


FREE HONEY!!!! now I can get honey for free and I don’t need to waste plastic anymore!
You might not get honey bees.
Who loves bees and who wants to help them
this is so coolI love this I have to do this this is going to be so much fun me and my dad love doing things like this I bet we could do it because we have lots of wood and I think this could work because I love the bees and I have a lot of flowers in my backyard and my front yard well in my garden of course I have a lot and I have lots of food that my my bees can pollinate so and I do have a bee house already but it would be good just to make another one
I love bees
I made a a bee cond
I love bees they produce fruits and honey
I love all pollinators and I saw the mission and had to accept and now we can make a BEE CONDO!!! I’m so happy that there’s a mission to help the bees we have so many pollinator hotels but not a condo!!!!!
I want to build one! I love bees and want to increase their population!
We saw one of those at the park today! Now, I know what it was!