Equipping parents with information, resources and thoughtful content is a priority for us here at Earth Rangers. We are thrilled to be launching a new feature. Our parenting blogger, Karen Horsman, is the former national parenting columnist for CBC radio. For more than a decade, she interviewed experts from around the world, seeking insight and advice to help support parents on their journey.
Karen is looking forward to continuing her mission to connect parents with meaningful content through a story telling lens. From how to nurture independence to embracing the great outdoors, you’ll find a wide variety of topics in her blog posts. Happy reading!
No instruments? No problem! Get the gang together and head on outside to play some tunes, with a little help from nature. It’s time for a symphony!
Here’s what you need:
Friends or family to join your orchestra
Your favourite outdoor space
Here’s how you play:
Step 1:
Make your way to your favourite outdoor space. It could be your local park, a walking trail, or even your backyard!
Step 2:
Take some time to track down your instruments. Get creative with it! Anything you see laying around is fair game. A pinecone xylophone, a blade of grass as a kazoo, a fallen bundle of leaves as maracas, small rocks to clap together like a cymbal… the sky is the limit!
TIP:
Make sure to respect your environment by only using natural items you find laying around instead of ripping up living plants.
Step 3:
Once you have your instruments, gather ’round and start playing! Pick a song and decide who will play each part.
This year, we held our second Backyard Biologist Photo Contest, where we challenged you to snap a picture of some biodiversity around you. Well, the results are in and we’re excited to announce the winners!
We got TONS of pictures and we were amazed by your incredible shots! There were all kinds of pictures of plants, animals, and other living things like fungi.
“Photo of an Orange-Belted Bumble Bee, taken In our back yard in June 2022. We used Google to identify it. We plant lots of flowers for the bees in our yard.” – Leland, age 10
“We found this baby Eastern painted turtle on the pebble bank along the Grand River. We nearly didn’t see it, so we put it safely on a rock near the water and then it swam away. We have seen babies and adults in our area before and also used Google to double check type of turtle.” – Jillian, age 9
Congratulations, Jillian!
Winning Plant or Fungus: Ranger Maelle’s orchid
“Orchids are beautiful flowers, and one day I was looking at the bottom of the orchid and I noticed that it looked like an animal. I was fascinated that the bottom of the Orchid looked like a bird and a little cheetah. Online I researched about mimicry in Orchids, and how plants develop ways to bring pollinators to them. This photo shows the details of this plant.” – Maelle, age 8
Congratulations, Maelle!
This year, we unveiled the winners at the Royal Ontario Museum. Attendees got to see the lovely Earth Ranger pics up close, but that’s not all. They even got to meet some of our animal ambassadors! In case you couldn’t make it, here are a couple of shots:
Nacho the Curl Crested Aracari!Millie the Three-banded armadillo!Sonic the Barn Owl!
Congratulations to all our winners!
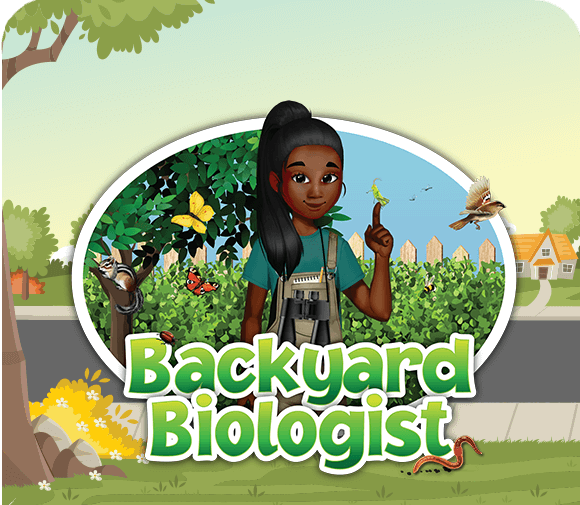
Have you accepted the Backyard Biologist Mission yet? Look for it in the app to learn all the ways you can explore and identify the biodiversity in your backyard!
Greetings from Saskatchewan, Earth Rangers! Summer might be
on its way out, but in the prairies something much more exciting is making
moves: monarchs! Here’s an update from Becky at Nature Saskatchewan to catch us
up on the latest news about our fluttering friends!
In anticipation of their arrival to the prairies in early August, Nature Saskatchewan staff researchers were busy planning and doing fieldwork. With the native prairie in full bloom, 7 staff were out searching for the milkweed and flowering plants that monarchs rely on, visiting local land stewards to share information and raise awareness about just how important their properties are!
Rachel out in the field collecting data!
Although it was still early in the season, staff were very
optimistic that all the important prairie habitat being conserved by land stewards
was helping, and that they’ll see many monarchs in the coming weeks. There were
already a few early sightings, including this awesome pic from the field!
So far, Nature Saskatchewan staff have visited with 91 land
stewards, and almost half are already participating in the Stewards of
Saskatchewan programs – amazing! 32 have signed agreements to conserve and not
destroy habitat, all while reporting each year on their observations, and were
equipped with a handy “toolbox” of information from Nature Saskatchewan to help
them be successful stewards of this important ecosystem.
Thanks Becky for the awesome update!
Head to the Adoptions Section in the Earth Rangers App or visit the Earth Rangers Shop to get your Adoption Kit and help make a difference today!
Axolotl (Ambystoma mexicanum) is an aquatic salamander that gets its name from the native Aztec language. The word refers to the Aztec god Xolotl. Legend has it that Xolotl transformed himself into an Axolotl to escape banishment.
Did you know that the average meal travels 1,200 km to reach your plate? That’s not breakfast, lunch, and dinner together. That’s EACH meal! You know what makes it even worse? Greenhouse gases are released at every part of that journey, and greenhouse gases contribute to climate change. When we eat locally grown foods, the impact is MUCH smaller. Supporting local farmers is a great bonus, too!
So how can we keep it local all year long? You can’t buy local food in the winter, can you? Actually, you can! Each season has its own harvest, with plenty of fresh fruit and veggies ready to eat. Check out this list of the produce available in Canada across all four seasons!
Now, remember that Canada is a BIG country. What grows in Niagara might not be the same thing that grows in Regina. When you’re shopping, always look for fruits and veggies that are grown in your region!
Summer is a prime time for picking!
There’s lots to choose from in the summer! Strawberries, rhubarb, and cherries start the season. Soon after that, raspberries, blackberries, and watermelon are ready. Other summer superstars include stone fruit, like apricots, plums, nectarines, and peaches. As the summer winds down, grapes and pears start popping up.
Oh, and we can’t forget about vegetables! Cucumbers, peppers, celeries, tomatoes, zucchini, beets, kale, corn, eggplants… the list goes on. Veggies of all kinds are available all summer long!
Leaves aren’t the only things dropping in the fall!
What’s a clue that fall is here? Apples! Time to head out to your local orchard and go apple picking! Pumpkins and squash are a pretty big deal. There are sooo many types to choose from, and so many possibilities! You can eat them, carve them, or use a funky looking one as a decoration. Most summer veggies grow until the end of fall, too.
Growing strong in the winter!
Living the locavore life doesn’t end with fall! You can find cranberries, pears, and even some apples if you’re extra lucky. You’ll probably have the most luck with veggies. Garlic and root vegetables like potatoes, turnips, beets, and sweet potatoes are everywhere in the winter.
But wait – don’t forget greenhouses! They can give us local crops year-round. For example, cucumbers, tomatoes, and strawberries are in greenhouses across the country. This is a good way to make sure your food is grown close to home, no matter the season!
Sweet, sweet springtime!
When spring has sprung, it’s time for spinach, peas, broccoli, fiddleheads, and kale! You can also find some apples and strawberries. But the best part about spring is that it’s maple syrup season! Farmers tap the maple trees to collect the sugary sap and turn it into maple syrup we know and love. YUM!
There you have it! Everything you need to know to be a locavore all year long.
When are your favourites in season?
Are you ready to become a locavore? Check out the Live, Love, Local mission in the Earth Rangers App today!
This personalized map will have you walking, biking, or roller-skating over to your favourite places in no time!
Here’s what you need:
Four coloured pencils, crayons, or markers. Use any four colours you want!
One piece of paper per person in your family
A magnet to put your map up on the fridge!
Here’s how you make it:
Step 1:
Visit www.google.ca/maps and click directions. Enter your address and one of your favourite places to drive to. Select your travel method (by bike or by foot). How much longer does it take?
Step 2:
Take your paper, coloured pencils, crayons, or markers and draw a map of your non-motorized route. Use one colour for water, one colour for roads, one colour for your house, and one colour for your destination.
Step 3:
Label your map with street names. Then, create a legend for your map in the top left corner. What does each colour represent?
Remember to hang it up on your fridge when you’re done! Where will your map take you?
Picture this: You’re on a long road trip with the family. It’s hour 2 and you’ve already run out of snacks. You still have 10 hours to go. You’d love nothing more than to take a break, stretch your legs and maybe find a bathroom.
Suddenly, you hear it: blink, blink, blink. Inside, you’re thinking,‘YES! We’re stopping!’ as your parents pull off the road.
Does this sound familiar? It’s probably something you’ve been through before. Just like you, animals on long journeys also need a break now and then, especially the ones that go on EPIC migrations. What, you didn’t expect them to do it all in one go, did you?
Some bird migrations are SUUUUPER long. They can go from the top of the planet all the way down to the bottom. For them, a place to rest and recharge is super important. These are called stopover sites.
Now, not every stopover site is the same. It’s like how you don’t need a bed if you’re just filling up the car and popping in to use the bathroom. The things birds need at a stopover site change depending on what they’re using it for. Let’s take a look at the 3 types:
Fire escapes: For emergencies only!
What do you do when there’s a fire burning out of control near you? Find the fire escape, of course! It’s the same for a bird with a predator hot on its tail! It just needs somewhere to can go for protection, and a fire escape stopover site does the trick!
This stopover site doesn’t have a lot, but it’s somewhere a bird can go in an emergency. It will protect it from predators and bad weather, and let it catch its breath. They can be pretty much anywhere: city parks, lighthouses, even your backyard!
Convenience stores: a little of this, a little of that!
You’re about to pour yourself a big bowl of cereal when…uh oh! You’re out of milk. Now, your parents could go all the way to the grocery store and deal with long lines, or they could hop over to the corner store. Which one do you think they’re going to pick?
Like a real convenience store, birds that stop here will get a good selection of things but not everything. These stopover sites are larger patches of land that have more food and shelter than the “fire escapes”. It might not be perfect, but birds can get some much-needed food and rest.
Full-service hotels: Room service, please!
Ahhh! It’s been a long day of sightseeing and touring. You’re now ready to just relax. Are you going to choose to sit on a bench, or head back to the hotel where you have everything you need?
This stopover site is the best of the best! It has it all: lots of food, good shelter, and barely any predators. These are usually national parks, large forests, or protected natural habitats. A bird can rest and refuel for as long as it wants.
Stopover sites are super important. Without a safe place to rest during their migration, it would be a lot harder for birds to get to where they’re going.
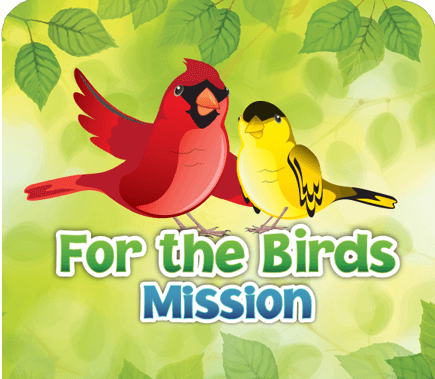
Do you want to help birds too? Check out the For the Birds Mission in the app! You’ll learn how to help local birds and make an awesome bird feeder at the same time.
Do you ever wish you could live up in the treetops? Imagine lounging on branches like a smiley sloth, or being a baby koala hanging on to a parent like a backpack as they climb up the trees!
Species that live in trees are called arboreal animals. They’ve evolved in ways that helped them adapt to life above the ground. Some arboreal animals have long, strong, prehensile tails that help them grip branches. Others like to climb and cling on with their curved claws or sticky feet. Some have funky features that might surprise you!
Check out this list of our favorite tree-dwelling animals around the world!
Kinkajou
Photo Credit: Silk Knoll
You might not have heard of a kinkajou, but you definitely know their cousins… These South American fruit-lovers are actually related to raccoons! Like many others on this list, they have a prehensile tail, and their little feet help them grip and pivot their way around up in the trees.
Bearcat
Photo Credit: jinterwas
Bearcats look exactly like you’d expect: kind of like a bear, kind of like a cat… but they’re neither! These mammals can be spotted in tropical rainforests across Southeast Asia. Like many other tree dwellers, they have strong prehensile tails that help them climb. The coolest part about bearcats? They’re known for smelling just like BUTTERED POPCORN!
Silky anteater
Photo Credit: Quinten Questel
Don’t let the name fool you—this kind of anteater spends all its time up in the trees! Silky anteaters have long, curved claws, that help them climb trees. Once they’re up there, they use their prehensile tails to move from tree to tree.
Skywalker Gibbon
Photo Credit: Axel Blanchard
Hm…now, where have we heard that name before? These guys were discovered in 2017 by some Star Wars-loving biologists. While these gibbons might not be related to Luke or Anakin (as far as we know), they are still super cute. They live in China and Myanmar, and love sleeping on skinny branches way up in the tree tops.
Fun fact: Skywalker gibbons have something in common with… roosters?! Yup! When they wake up at dawn, they perform a loud song. These songs can last an average of 22.5 minutes!
Greater glider
Photo Credit: Doug Beckers
Greater gliders are marsupials from Australia. They have big, floppy ears and a long, bushy tail. To help them “glide” from tree to tree, they have a special layer of skin that stretches from their elbows all the way down to their ankles—kind of like a built-in parachute!
Bark beetle
These beetles are a very important part of their ecosystem because they help renew forests. Often found in dying trees, they spend most of their life there just below the bark. They chew through the outer layer of bark, digging and eating their way to a place where they can lay eggs. The larvae and pupae remain in the tree, moving to different “chambers” along the tunnels as they grow.
Have you ever seen an old or dying tree with a bunch of squiggles all over? Those squiggles are leftovers of the tunnels these critters like to make!
Flying dragon
Photo Credit: she1101
These little ones, also called “Dracos”, spend almost ALL their time in the trees. In fact, the only times you’ll spot one on the ground of their tropical forest habitat is to lay eggs—even after the eggs hatch, the first thing the babies do is climb right up.
These lizards have expert guiding skills. A special membrane supported by extra-long ribs opens up to help them travel. Even though adults are only 20 cm long (including the tail!), they can travel up to 60 m in one glide—that’s about half a football field!
Tree Kangaroo
Photo Credit: Richard Ashurst
Tree kangaroos are kangaroos that…you guessed it…live in trees. To adapt to arboreal life, these marsupials have much stronger arms, shorter legs, and a different kind of long tail than their land-based cousins. Their sticky paws help them grip trees as they climb. They like to snack on leaves but they’re known for munching on plenty of fruits and flowers, too!
Emerald Tree Boa
Photo Credit: shankar s.
Arms and legs are super important for arboreal animals… but what happens if you don’t have either? Just ask the emerald tree boa. Size and strength are what help these guys the most! Growing up to 3 m long, they wrap their bodies tightly around the tree as they slither up high.
To catch prey, these nocturnal snakes hang from a branch with their head near the ground, waiting patiently to catch their next meal!
Tree frog
Photo Credit: madsvisions
We love tree frogs so much, we put one on our logo! There are many kinds of tree frogs, but they all have some common traits. They’re known for having a slender body, big round eyes, long fingers and toes with round tips, and sometimes, bright colors! These tiny creatures use the suction on their digits to get a strong grip as they move around.
Can you think of any other animals that live in trees?
You’ll go BANANAS for these adorable frozen banana pops!
Here’s what you need:
Bananas
1 cup chocolate chips
2 tablespoons of coconut oil
A wide-mouthed dish for melting and dipping
A lined baking tray
Popsicle sticks or kebab skewers
Here’s how you make it:
Step 1:
Peel the bananas and cut them in half. Slice one half — you'll use these for the monkey's face! Insert a popsicle stick into banana halves, right where it was cut. Freeze them until they're frozen solid.
Step 2:
Ask a grownup to help melt the chocolate chips and coconut oil. Set aside a handful of chocolate chips for decorating!
Step 3:
Let the dipping begin! Dunk each banana half in chocolate, then place it on the lined baking tray.
Step 4:
Time to decorate! Place a banana slice near the tip of your pop to make the face. Using your chocolate chips and any leftover melted chocolate, add little eyes, ears, and anything else you'd like!
Place your monkey pops in the freezer until you’re ready to dig in!


")