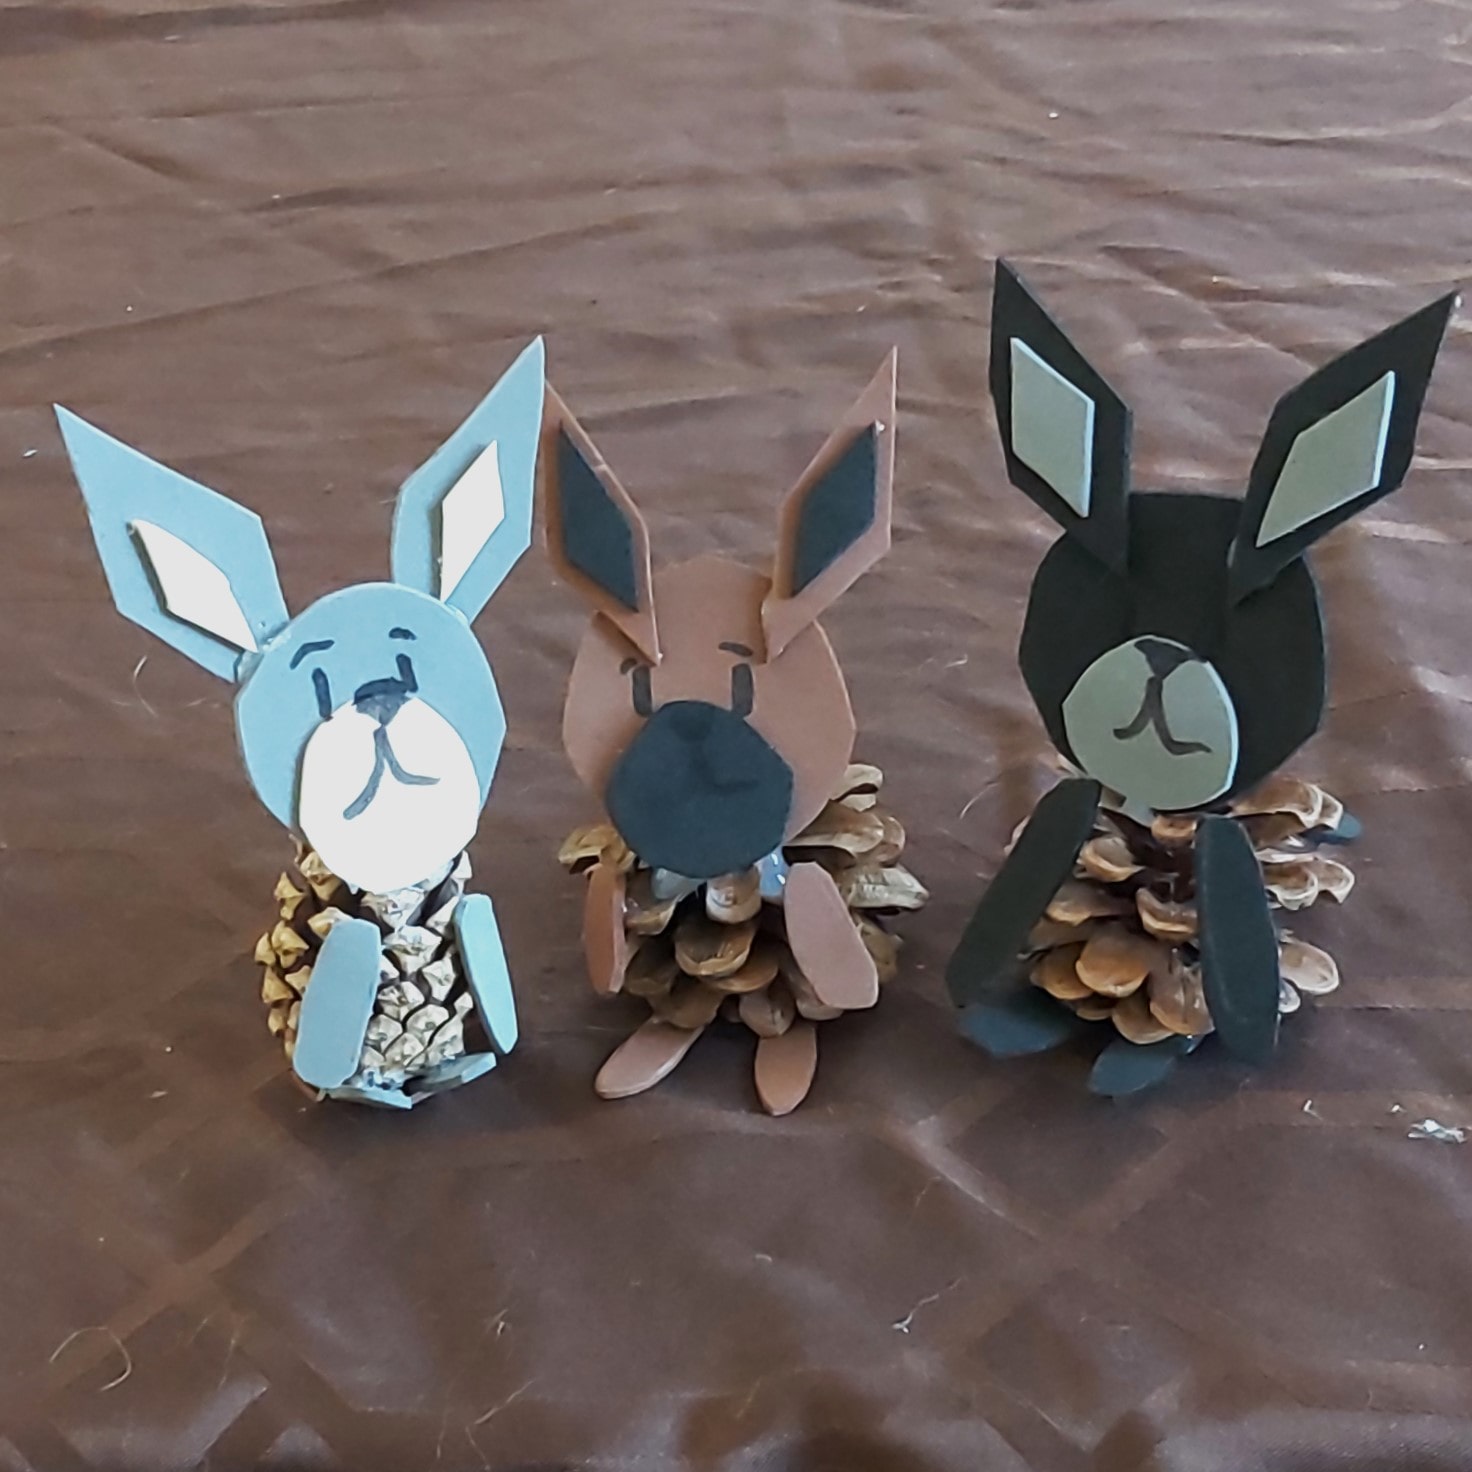
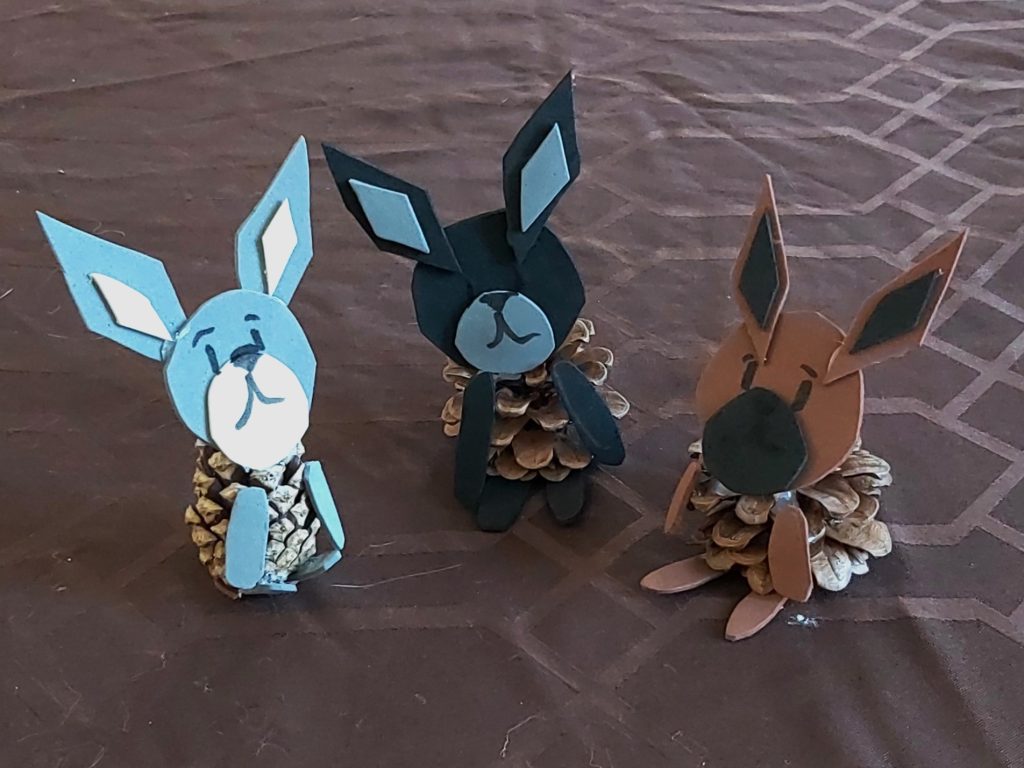
Pinecone Bunnies
 Time:15 min
 Difficulty:Easy
These aren’t your ordinary cottontails. These pinecone bunnies are ear-resistible!
Here’s what you need:
- A pinecone
- A pencil
- Scissors
- Glue
- A black marker
- Paper, felt, or foam sheets in 2 different colours
Here’s how you make it:
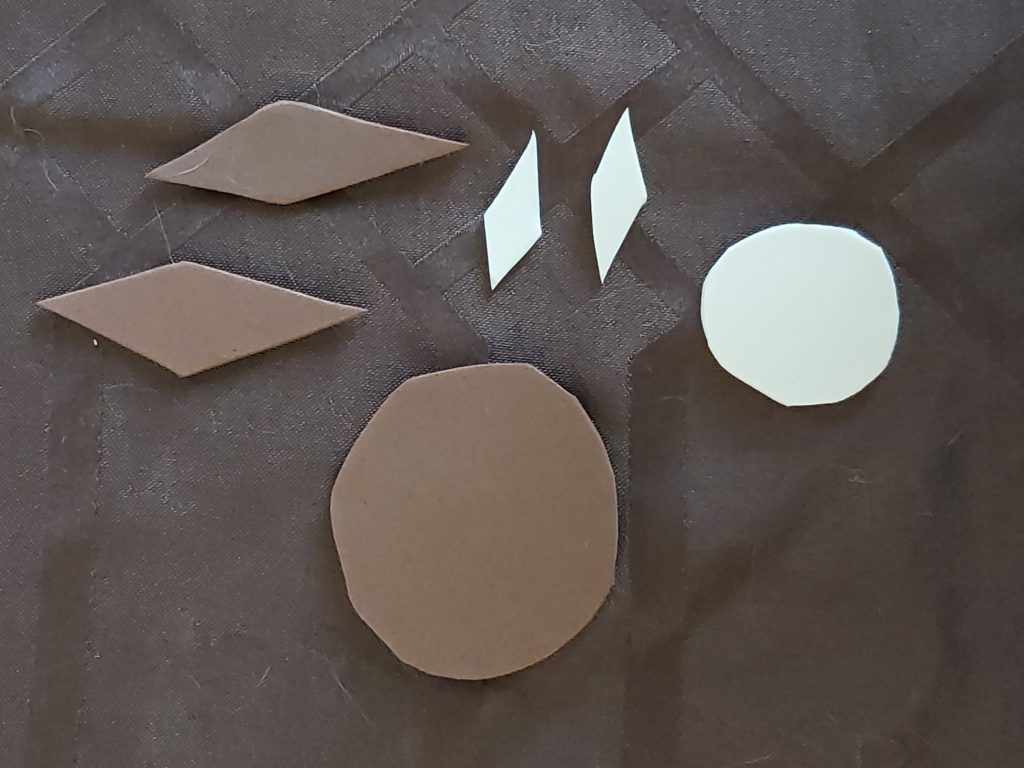
Step 1: Cut out some shapes to make your bunny’s head. In the first colour, you’ll need a big circle and two big diamonds. In the second colour, you’ll need a smaller circle and two smaller diamonds.
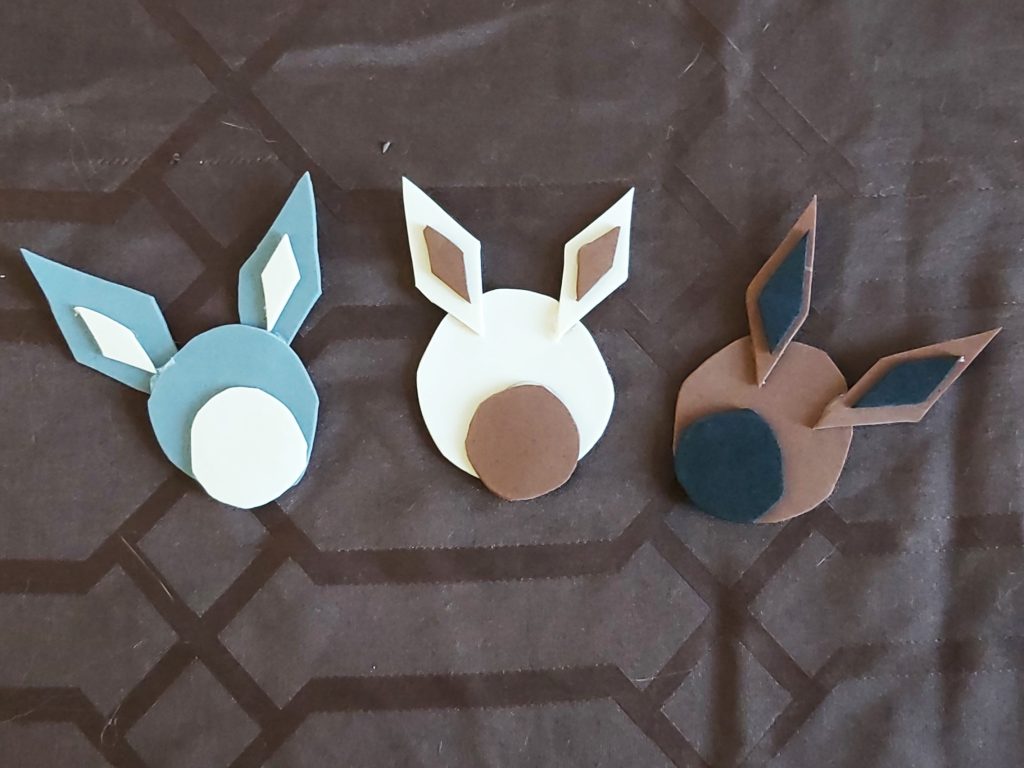
Step 2: Glue the circles together, and the smaller diamonds to the larger ones. Once they are all dry, glue the ears to the head and draw on your bunny’s face.
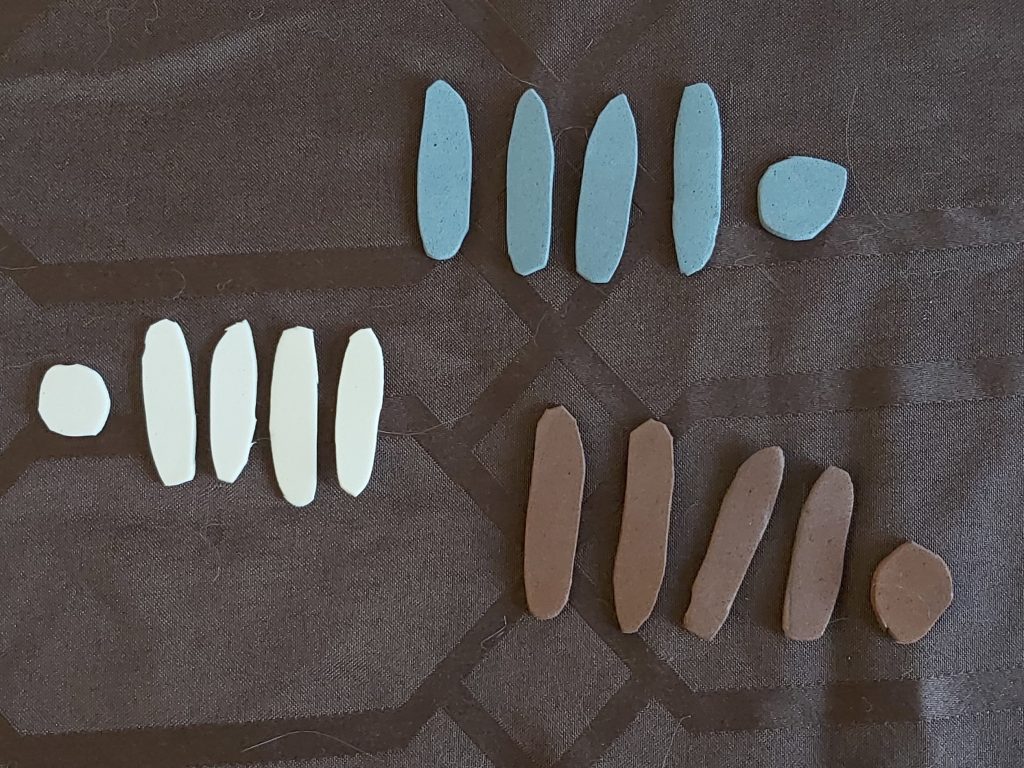
Step 3: Using your first colour again, cut out four long ovals and a small circle. These will be your bunny’s arms, legs, and tail.
Step 4: Finish your bunny by gluing the head, arms, legs, and tail to the pinecone. Once everything is dry, your little critter is complete.
The only thing that I would say is that is very good
Me too
so awsome. just a tip, use hot glue to stick the stuff together.
Looks good
Cute
I don’t think I can wait to make it
Wow that’s cool we see bunnies in our backyard.
I so much
That looks so cute!
We can do that! We have all the things to do Pinecone Bunnys.